How to Use OBS Studio - Complete Tutorial for Beginners!

Download OBS Free Here: https://obsproject.com
Video Transcript -
OBS Studio or Open Broadcaster Software is a powerful and very popular live streaming software and screen recording app. It runs on Mac Windows and Linux and it can stream to places like Facebook Live, YouTube Live and pretty much all of the major live streaming platforms. With all its great features, though, it can be a little overwhelming for new users.
But don't worry. This tutorial is designed to get you up and running fast and walk you through all the key settings in the steps that you need to know to host your next live stream or record your screen using OBSS, all in just a few minutes. Plus, I'll also share with you some low cost resources or tools that work great with OBS along the way, like how to get a cool animated title for when you're ready to take things even further.
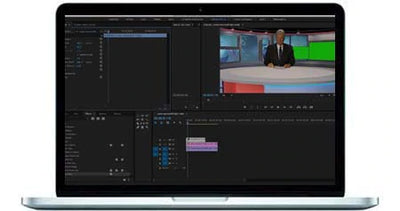
Okay, so here we are in OBS now. Going to take you through this walkthrough using a mac, but the process is exactly the same if you're on PC as well. This is a brand new fresh install of jobs, so this is what you'll see if you've never opened the app before. This big black box here in the middle is your preview area.
This is where you can see what it is you're going to be broadcasting out down the bottom here. We've got our controls. This is where we can start streaming, start recording. We can switch between this preview mode and studio modes of our press on this now. You can see that we have our program monitor, which is what we're pushing out.
This is exactly the same as what you were saying before, but now we've actually got a preview as well. That's a little confusing because the other one is called preview mode. And this is the preview here. But essentially, we can queue things up on this side and then when we press this transition button, then it will actually send a live.
So very moving graphics and those sorts of things around. And you want to not be doing it while you live or the viewers aren't watching what you're doing while you live. Then you can use this mode studio mode to have that ability. For me personally, if I don't need that while I'm live, I'm going to go back to the regular mode, which is the one big preview window, but this is something you can switch between while you live the next one down here is the settings button.
This will bring up all of the settings for OBC and we will jump back into this one very shortly. Exit. It's pretty obvious it's going to exit the app. Down the bottom here is pretty cool that you can actually see your CPU usage, so you can see if your computer is under load and you're potentially dropping frames or having a bad live stream.
If your computer is under too much stress, you can see all of that at a glance down the bottom here. You can also easily see how long you've been live for or how long you're recording has been going for as well. The next panel along is your transition panel. This is where we can adjust the different types of transitions we have between the different scenes.
We'll get the scenes in a minute, but know that you can adjust your transitions here. Or if we have back on that studio mode, you're transitions are also in the middle here as well. Let's get back to preview mode. The next one across here is your audio mix up. This way you can easily see and adjust your volume levels for each of the different elements you're going to have in your live stream or each of the different sources you're going to have in your live stream.
And next to that, we've actually got our sources. This is where we can add in all of our webcams, images, videos, websites or anything we want to actually include and use in our live streams. And the next one across here is your scenes panel. Now, this is essentially we can have groups of assets or different configure options for different elements or different sections of your live streams.
So you might have a scene set up for just a full screen image of you on the screen. The next scene might be your computer screen that you're sharing, and you might have another scene for you with some text on screen. And as like almost every program out that you've also got your standard menus and options and stuff across the top here as well.
So that's the overall interface. Let's jump into getting OBS set up. So I come down the bottom here to settings. Now a lot of the settings in here are going to be personal preference and also going to come down to the type of live stream or the type of recording you're actually going to do. Things like how it looks, the theme, whether you want dark mode enabled or you want some other theme in here, then obviously that's personal preference.
Likewise, with some of these output confirmations here, things like being able to show a confirmation dialog box when you're starting a stream or showing one when you're stopping a stream. This is what I would normally have. I'm like, Are you sure you want to stop the stream a little pop up asks you if you want to confirm that I'll normally have this one on and the same for stopping recording as well, just in case it accidentally gets knocked and you don't want to stop streaming.
You don't want to start recording unless you've got a confirmation box here to maybe save you in that case. So for me personally, those two are the main ones that I'll add on this window. But I would suggest that you have a scroll through this section and just see if there's anything that stands out to you, maybe at a later stage, once you've gone through and set everything up, that you can then add this further level of refinement to customize things up for you.
I guess that's the general settings. The next one down is your stream settings. Now this is where we get to choose our streaming service, whether it's Twitch, whether it's YouTube, Facebook. So these are the primary ones here. If we actually hit on show all, it brings up a massive list of all the supported live streaming platforms. So when you go ahead and select a YouTube RTM P, then we need to paste our stream key into this box.
Our unique key for our specific live stream. So go over to our YouTube channel, grab the key will come down here to stream key here. We'll hit copy and then we'll go back over to Obi's and paste our stream key into that box there. Next, we only come across to output. Now this is where we get to specify our output settings for our live streams, but also for our recording as well.
So for configuring up our live stream, we need to specify a video bitrate the default here 2500 kilobits per second would be okay for a 720 stream, but with this number 2500 kilobits per second, the higher we go with it. If we went to 3000, 3500 or 5000, the higher we go with it, the higher the quality of the stream they're going to push through to YouTube or whichever platform I broadcasting to.
But it also means that our Internet speed, our upload speed needs to be capable of consistently pushing that amount of data through to our broadcasting platform. Now I'll link this page down in the resources below, but this is where YouTube suggests which bitrate you should be looking at for the different resolutions. So this page tells us if we want to broadcast live to YouTube at 720p the video bitrate range should be between 1000 504,000 kilobits per second.
If we're doing a 1080 piece stream, that needs to be 3000 to 6000 kilobits per second. Now we can go above, but you really don't want to be going below these numbers for a decent looking reliable stream. So in this case here, we're going to be doing a ten ADP live stream through to YouTube. So I to set this to 5000 kilobits per second because I know my Internet speed is good enough.
So that's the video quality. We can also make changes to the audio quality here as well. Now, I would recommend that you're not going less than 128. The default here was 160. That's going to give you pretty good results. 192 right up to 320 will give you higher quality audio. So if you're me broadcasting live with music and those sorts of things and you want to have the highest quality through, then you going to want to pick a higher quality bitrate for your audio as well.
Personally, I think anything from 160 to 256 is going to give you great results, but if you're only just speaking in your live stream, then you'll be able to get away with 160. So those are your livestreaming settings. If you do want to also be recording or you just want to use OBS for recording and that's where your settings down here, you can keep all of those in of the main ones being your recording format, you can see the default.
Here is MKV, you might want to switch it to an MP for and movie file and you also want to adjust your recording quality because in a lot of cases you want to actually record a higher quality video than the one that your streaming out. So higher than 5000 kilobits per second in this case. So we could choose a high quality, medium file size or one of the other options in here as well in this next area here, audio is where obviously if we get to dive into some audio settings now, there's really only a couple in here that you need to look at.
The rest are going to be fine by default. The first one is your channels. By default, you want to have this set to stereo unless you specifically need to be broadcasting in mono or surround sound. 2.15.1 surround sound. So for most people you don't want to leave this at stereo for most live streams on most recorded videos. But the one that you really want to check in here is your primary audio source, which is your mic auxiliary audio, not audio to three or four to the first one here.
And you want to change this from default to your actual microphone that you've got connected to your computer or to your camera, which is connected to your computer. So in this case, I'm going to set it to the cam link 4K because the microphone I'm using is going to be directly connected to my cam link, which is connected to my Panasonic phone.
So for audio, I want it coming through the cam link. Now, even if the default setting here of default is using your correct microphone because of your system settings, I was still strongly recommend that you're manually setting this to your actual microphone just so that you don't have any issues down the track. This next one down here video.
This is where we get to specify all of our video related settings for the quality for the frame rate of the live stream that we're going to be creating both here in jobs and also to whatever we're going to be pushing out to YouTube in this case or even to be recorded. The two of them don't actually need to be the same.
So you could actually be working from a higher resolution project in OBS, but broadcasting out to YouTube or recording a video file in a lower scaled resolution. And that's what we get to specify in here. So the default here is that our base canvas resolution now Obis resolution is at 1920 by 1080, which is ten ATP, But the default is saying that we're going to be broadcasting now output is 720p 1280 by 720.
So I'm going to hit this little dropdown arrow and I'm going to switch this to 1920 by 1080. Now you do have the ability in here to pick other resolutions. We can actually just type in that custom resolution as well. So you see that there's nothing that goes above 1920 by 1080, but if you want to broadcast in 4K, then you can actually type in the resolution numbers for 4K and you would be good to go.
So Video 1920 by 1080, I'm going to leave our frame rate here at 30 frames per second. This next one down hotkeys is where we can set up shortcut keys to be out of control obese so we can create our own keyboard shortcuts to do things like start or stop streaming, start or stop recording or a heap of the other functions that you've got inside of obs as well.
So this is something that's not necessary, but it can really streamline the way that you're able to control and configure everything up and run your live stream while you actually live and down here under advanced, you guessed it, there's a lot more advanced settings in here. I would say the one that I do check here and make sure is selected is to automatically reconnect.
So if for whatever reason your Internet drops out, that is actually going to automatically attempt to reconnect and to restart your stream with this setting enabled. So when you go ahead now and select. Okay. And now we're going to go ahead and set up our scenes for our live streams. So Video one default scene that's added down the bottom here because there always has to be at least one that's created.
And going to rename this one, right click on it and choose rename. Let's call this main camera. Now for this main camera, we now need to specify which sources we want to have used, which cameras we want to have used in this scene of main camera. So we're going to go ahead and press the plus button. We're going to choose a video capture device.
Now, video capture device is any camera, any webcam that you've got connected to your computer. So we're going to take a video capture device. We can give it a name here. Lester's Cam link, 4K and Go came. And now we're going to specify which camera we're going to link here to this video source. So you can see I've got the choice of my built in webcam.
The Logitech Brio webcam, a five that I currently don't have connected, but it is installed and the cam link 4K, which is the one that I want to use. So selecting it. There we are works. I'm on camera, but you can see just by selecting one of the other ones that they're going to show up there as well over here now.
So for this primary camera main camera, we want this one as the cam link 4K and you can see that the preset here, the default setting for it is 1280 by 720. Now, we've really told OBS that we want our canvas size to be larger than that at ten ADP. So in this case I'm going to make it bigger by selecting high because that's the actual setting that I've set in the cam link to be at ten ADP knowing that it's going to match here.
So for usually the pick hi or you pick the resolution that you want to have as your camera resolution. Once that's done, we're going to go okay. And you can see here that we have Cam Link here added on the main camera scene. And we also have the audio bars here working so that we can see that the audio piece is working as well.
Now, inside of each scene, you're not just limited to one camera, one video, one audio input. You can actually have multiples. We can come back in here and we can add in our other webcam. If we go to add a video capture device, let's name it webcam. Okay, Now select the Logitech Brio and again, make it the high setting and go, okay.
You can see that we actually now have two and we can actually turn them on and off all within the one scene. So for a really basic setup, you could get away with just one scene set up and you're just switching between the different camera angles and things just by turning the layers or the inputs on and off.
And you can actually change the hierarchy of them so you can pick them up, you can move them around. So you could create a basic stream this way. But where this does become more complicated is if you've got lots of different layers or lots of different inputs in there that you want to be switching between a couple of different screen shares, a couple of different cameras.
If you then trying to switch between things while you live is likely, you could be clicking the wrong ones and getting frustrated and overwhelmed with all the settings. That's where scenes become really powerful. So we can have one scene just for our main camera. Then we might have a scene for a screen share. We might have a scene that we cut to for playing a video animation or something like that.
So that's what we're going to go ahead and get set up now. So I'll remove this webcam here, hit the minus and let's go make sure you submerged. Yes. Let's add a new scene and let's call this webcam and can add in that video capture device, Logitech brio. Okay. And let's find our camera. Logitech brio, set that to high.
Let's go. Okay. So we now have two scenes set up our main camera, which is the main camera, and we have our webcam as well. Now, with all of these inputs, we can dive in and we can customize them up as well. These video sources, we can just select on the screen and pick them up and move them around.
We can resize them if we want to make them bigger or smaller. So you can actually dial these things in as well. And I'll show you more about that very soon. Let's skip this back to the correct size and place this back up here. Okay. So we have main camera. We now have webcam for the secondary camera. Let's create a new scene as well for screen share and so over here, we're going to hit the plus and we're going to bring in either a window capture if you just want to bring in a specific application window or if you want to bring in a whole computer screen, then you can choose display capture.
This is where if you've got a second screen connected to your computer, this is a great way to do it. So that's what I've got in this case, display capture and in this call, this second monitor was defaulted to the primary one. In the main one we can just change display to be the other input number one. We also get to specify if you want to have the mouse cursor shown on that screen as well.
So we go over that screen. Now my yellow see, my mouse cursor is moving around on there, so we get to turn that on and off with this little checkbox. I'm going to turn it off because in this case, if we were setting it up with PowerPoint slides or something, I'm not going to want the cursor on them to go, okay, and this has come in here.
So again, we want to shrink this down so that it fits into our canvas area. And we now have a scene here for my computer screen, a second computer screen, which has a PowerPoint or keynote presentation on it. I can click and go through the slides and all those sorts of things. So very, very easy to add these screen shares and things in here as well.
Now, we can even take this one step further if we go back to our screen share here, let's duplicate this so we get a copy of it and we can go screen share with video. So another scene that we might want to cut to would be our screen share here. Now, computer screen, but with me on screen as well so we can add in here our webcam again.
So if we choose video capture device and let's choose add an existing one because we've already added it once we're going to choose the cam link 4K. And so I'm now full screen over the top. We want to scale me down, scale this camera down. So could be that we have a little picture in picture effect on top of our screen share.
Yeah. So these are our scenes now if we go back to main camera, take is me on the main camera full screen, then if we want to cut to our secondary angle, maybe this is a top down angle or something. If we're going to be doing any writing on the desk, then we've got our screen share and we've got screen share with video as well that we can switch to all of these.
We can just switch between just by selecting them down the bottom here while you're actually live. Now, there's one last thing that I'm going to add in here to show you, and that is for our video intro. So if you're going to be using videos or even photos and things in your live streams or graphic overlays, then you can add them into their own scene as well.
So as create a new scene that's call it intro video, go. Okay, Now we're going to add in our source for that. And you can see we've got the option here for Image. We've also got media source as well. So if we get a media source, this will be our video intro and let's set a local file. Let's go through Browse and you'll find it.
So it's on my desktop video intro. Now we have some options in here for our video. When we select it, we can have it loop. So I just plays continuously. We can have it restart the playback when the source becomes active. So when we switch to this scene, then it's going to actually start from the start of the video.
So we'll want that one selected. We can have it set to show nothing when the playback ends, so it just goes to a blank screen. We can control the playback speed and some other advanced stuff in here as well, but those are the main ones. Let's go ahead and press. Okay. And you can see now that this scene is active.
It's playing our intro video. Now, this is something we really quickly knocked up just using place It it is ridiculously easy. There is a link to place it and a tutorial on how you can create your own amazing video animations and graphics and things to using your live streams and you can find the link down below this video as well.
And with each of these inputs, whether they're audio or whether they're video inputs that you've added onto your scene here, you can actually customize them up further. So I've shown you the properties area, which we can again, access to make those changes by either clicking properties to bring up this configuration menu or we can double click on it to bring up the same one.
Or if we come across two filters, this is where we can get further advanced controls and change up the look and feel of our shots and of our audio for each of those elements. So at the top you have got our audio filters. This has audio video filters, but it's really looking at the audio side of our audio inputs or our video inputs.
So if we hit the plus on this, we can add in audio adjustment tools, things like compress or expand again to adjust the volume and video delay. So if your audio is out of sync with the video, then you can come in here and you can adjust the delay of that as well. Likewise, down the bottom here, we've got some video filter effects in here as well.
So if we press the plus here, then this is where we can apply a lot to a look up table color grade. We can do Chroma key. So your green screen. So if you're sitting in front of a green screen, you want to remove that green or blue, then you can apply the chroma key effect. And you've also got color correction in here as well.
I'll just click on this one and please specify a name for the filter. Okay. So in here we can really dial in our shot and we can adjust the gamma to make it brighter or darker. We can adjust that contrast. So a lot of these things in here really give you some granular control over your shot. So we go back across the in and press the plus.
We've got cropping so we can crop down our shots, we can mask out areas of our shots as well with an image mask and you've got other filters and things in here as well. Now I'm going to close out of this and show you an example of where we would use one of these effects to back on our screen share with video scene.
If we select here the Cam link 4K, I would actually add a filter on this to slide down the bottom here and choose crop pad and I would crop the side of this. So it was actually smaller. So if I move this to the side here, we can crop off the right side. So this sort of our shot by using the arrows here, increase the numbers.
Now we actually just type it in this escapes know 200 just guessing maybe more 400 here you just go 600 and we'll also crop the left, maybe 400 just to see what looks good, maybe 350 and close. So you can see that we're able to reframe our shot as well and crop it using those filters. So that's a practical example.
And as a tool that I would use quite often inside of jobs. So now our shot looks like this. So we're able to remove all of that extra stuff. And I can also easily add text into your live streams as well. So let's go back to the main camera and let's set the plus down here under sources and let's go to text.
Now, let's just call this just title and go, okay. And then here we can type in our text. It's got Justin Brown. We can go and select our font. That's pretty good. Oswald And let's go bold and go, okay. If we scroll down, you've got some more settings in here around the colors and those sorts of things, so you can customize this up to match your brand.
You had an outline, you had a drop shadow. If you wanted to leave that really basic, then go, okay. And we've then got this text that we can pick up and we can move around to bring up while we're actually live as well while we're recording as well. And then that title is something that you can easily turn on and off inside of that same just by clicking on that little eyeball there to turn it on and off.
And it works exactly the same for any logos or anything or images that you want to bring in as well. If we want to bring in our primal video Accelerator logo, we can choose an image, let's call it PVA logo and go okay and browse to go and find it. And this one here we accelerate up and go, okay, and this is our accelerator logo that we can then position in this saying maybe scale it up a little bit if we want to customize it up further.
Again, we've got access to those filters. So it's like PVA logo, let's go filters and inside of here we could change it up or crop it down or whatever we need to do with it. So let's close out of this. So now you've got all of your settings dialed in. Your cameras are set up, your audio is set up, your scenes are set up, then you're ready to push that go live button.
So what I'd like to do here is normally if I'm going live to YouTube is I'll jump across to YouTube and I'll open up the live studio control area. So the access that you want to make sure that you're on your YouTube channel, sign into the right accounts, come back over to create and choose, Go live, and then you want to take stream over here on the left.
Or if you've already scheduled up your live stream, then you can go down here to manage and your live stream will be listed in there. So we've really gone ahead and we've configured up a live stream ready to go. We've already copied and pasted our stream key into obs, a quick little sanity check with the titles in. Now Privacy here is set to unlisted, which is what we'd like for this one.
Then what we need to do is go back to obese and hit that start streaming button. So if we press streaming, that's going to tell us that we are live down the bottom here. It's got a countdown timer saying how long we actually have been live for it. Also, tell us if we've got any dropped frames. So if our computer or a camera isn't keeping up and it also tells us, again, our CPU usage so we can see how much strain our computer is under and it also tells us our bandwidth usage as well.
So how much data we're pushing out based on what it is that we specified in our settings. So if we go across to the YouTube side now, let's switch back to that. We can see here that we are actually live on YouTube, so it's automatically started. Our live stream says that the stream is in excellent condition. It's also giving us our live chat here as well.
So that's why I like to have this open when I'm live on YouTube so I can still interact and talk to everyone while we're live in here as well. Now for those of you that are interested in that studio mode and what that looks like, if I enable that here now, I'll just maximize this screen again. Then we can see we've got a preview window here and we've got our actual live window on the other side here.
So if I want to say switch to this scene, it's cut it up, but it hasn't actually pushed it live until I come over here and press this transition button. The moment I press this, you'll see that the video will come across to this screen and play. So it's now playing. And likewise, if we didn't want to queue up the next shot, which could be the slides, then there's not going to go into this until I press the transition.
So if I press transition now, we're sending that scene live. So for those of you that want more control over it, it's not just one tap in your live with stuff. This is traditionally the set up you would have in professional live streaming software where you're able to set everything, customize things up, and then push it live instead of just switching between scenes while your life.
So that is a complete walkthrough on OBS, getting everything set up for your live streaming or even for recording videos directly to your computer as well. Now, earlier in the video I said I would also share with you. You can create amazing custom animations and graphics and things to use for your live streams or for your videos. Check out the video linked on screen now with a step by step tutorial on exactly how to do it.
And it's much easier than you're probably thinking. I'll see you in it.